This web page was created programmatically, to learn the article in its authentic location you’ll be able to go to the hyperlink bellow:
https://petapixel.com/2026/06/14/how-to-leverage-linear-camera-profiles-in-your-editing-workflow/
and if you wish to take away this text from our website please contact us
Linear Camera Profiles are a type of issues which were floating across the Lightroom neighborhood endlessly, however only some folks appear to make use of them. And whereas there are numerous video tutorials on tips on how to make a linear digicam profile in your digicam, there’s virtually nothing on tips on how to use them in your enhancing workflow.
So over the past month, I took it upon myself to determine this out, and I feel I lastly have an enhancing methodology value sharing. And after all, all this comes from the world of video enhancing. Where information is commonly captured with S-Log or different related flat-looking gamma curves, all the colour grading and enhancing is finished on that flat-looking picture, after which an output gamma remodel is utilized to get the ultimate look.
The identical thought will be utilized to images. Instead of enhancing a picture that already has a distinction curve baked in, we work on a flatter, extra linear start line and solely apply the ultimate distinction and tonal shaping on the finish. This offers us extra management and in addition has the potential to present us significantly better colour grades due to the way in which colour mixes with the distinction curve.
What are Linear Camera Profiles?
A linear digicam profile in Adobe Lightroom is simply a substitute for “Adobe Color” or “Camera Standard” digicam profiles that removes the built-in gamma curve and reveals our RAW information in a virtually “straight” (linear) tonal response, aka it makes our photographs look largely gray and under-exposed. But the purpose of taking pictures RAW will not be actually to have a pleasant preview. We need the information, and dealing with a linear digicam profile will give us higher entry to the uncooked information our cameras have captured. Just that our cameras apply a gamma curve to that information, so we will have a greater preview of how our photographs are going to look.
But when enhancing, we don’t have to make use of the identical gamma curve, and we will make our personal. And if that’s the plan, it’s in all probability value switching our cameras to a extra impartial profile whereas taking pictures as effectively for a greater preview, however extra importantly, for a extra correct dwell histogram that’s not strongly influenced by the baked-in gamma curve.

These curves imply total brighter-looking photographs, rolled-off highlights, shadow lifting, and plenty of distinction within the shadows. And they’re wonderful if we would like our photographs to have a clear, contrasty digital look. But since I need my photographs to have a extra filmic, cinema-like look, they’re in the way in which more often than not. And additionally as a result of the standard gamma curve has that large bump within the highlights, spotlight restoration turns into a bit harder in digital images, and we will get into ugly artifacting whereas preventing the gamma curve. Compared to this, a Linear Camera Profile with no predefined gamma curve can supply far more flexibility when enhancing. But the one factor {that a} linear profile received’t give us is extra dynamic vary. Our sensor can solely seize a certain quantity of dynamic vary, and it doesn’t matter what digicam profile we use, that received’t change. Linear Camera Profiles can solely supply us extra management over the information that the sensor in our cameras has already captured.
But “with great power comes great responsibility,” and in our case, this implies extra time spent enhancing and extra complicated workflows, so let’s discover ways to make certainly one of these profiles.
How to Make a Linear Camera Profile
Now that you’re hyped about linear digicam profiles and wish to attempt enhancing with them, I’ve some unhealthy information for you. You will first must create one for each digicam that you just personal and use usually. But don’t you are concerned; it’s fairly easy, and there are a ton of movies on the market on how to do that.
- Download Adobe DNG Profile Editor
- Export a RAW file as DNG from Adobe Lightroom
- Open it in Adobe DNG Profile Editor
- Go to Tone Curve → set it to a linear
- Export the Linear profile you simply created
- Import it into Lightroom utilizing the + within the profile browser
- Restart Lightroom and mark it as a favourite digicam profile
My New Workflow
Now comes the enjoyable half. The new enhancing workflow that I developed tha is impressed by the way in which colorists use nodes in DaVinci Resolve. But earlier than we begin, needless to say video enhancing workflows are usually not linear.
What issues extra is knowing the order wherein the software program applies edits to the picture, fairly than the order wherein we really pull on the sliders. And the 2 will be fairly totally different. In Lightroom, for instance, the Tone Curve from the Curves panel is utilized first, adopted by the curve that’s constructed into the digicam profile. After that, any curves created inside masks are utilized on prime of all the opposite edits we make in the usual enhancing panels within the order wherein we create the masks (backside to prime).
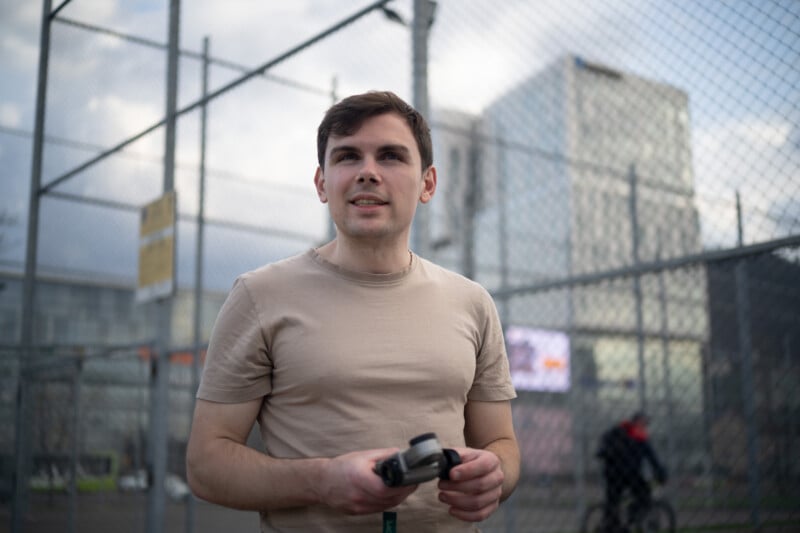
I often begin by addressing native publicity issues in my picture utilizing my False Color Camera profile to identify these, and a bunch of masks to deal with them. I additionally wish to set a correct white steadiness earlier than switching to the Linear Camera Profile, particularly if the picture has any type of sturdy colour solid, however at this step within the edit, I received’t do any kind of colour grading work or large publicity changes.
Next, I’ll swap to the Linear Camera Profile after which, based mostly on the content material of the picture, I’ll use the Exposure, Blacks, and Whites sliders to get a balanced publicity based mostly on the histogram. Usually, at this step, I’m trying to open up my picture and get a somewhat-centered publicity on the histogram whereas ensuring the black and white factors sit fairly near the left and proper edges with out clipping. Also, if wanted, I’ll use the Shadows and Highlights sliders to get well extra element from the picture information, however I attempt to not push them too far to keep away from an HDR-looking end result.
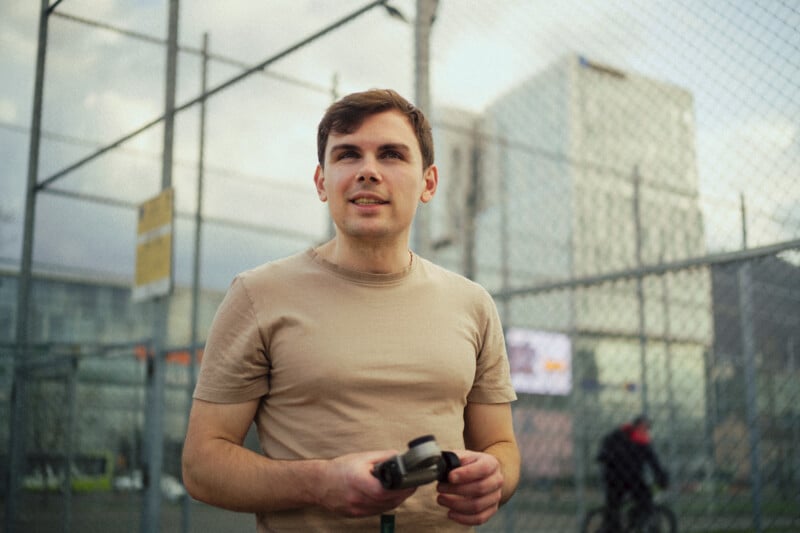
And proper afterwards, I’ll create a “select all” masks (a Luminance Range masks that may embody your entire picture). Here I exploit the tone curve instrument within the masks to create my very own gamma curve that would be the equal of an output CST in DaVinci Resolve. And the way in which this new gamma curve will look can fluctuate drastically based mostly on the content material of the picture and the creative route wherein I’m going with my edit. For instance, when doing movie emulation, I often go for large filmic shoulders with massive filmic shoulders, or, in contrast, if I’m going for a clear trendy look, I’ll go for a extra reasonable S curve that has the pivot level nearer to center gray. But usually, I do attempt to preserve the curve as easy as potential through the use of as few factors as potential for smoother gradients.

With the customized gamma curve set, I transfer on to my standard colour grading. Most of the time, I begin with Color Response Curves, alter the white steadiness to match the temper I’m going for, after which construct the look additional utilizing the colour wheels and HSL panel. At this stage, I additionally add grain, introduce delicate results like lens sharpness falloff, and use masks to reshape gentle and colour throughout the picture. If I find yourself utilizing numerous tone curve masks whereas doing so, I’ll usually copy the gamma curve, take away the unique masks that I created, and paste the identical settings into a brand new “Select All” masks. This masks now sits on prime of your entire stack, so Lightroom applies it as the ultimate step within the processing pipeline. This is perhaps a bit further on my aspect, however I wish to make it possible for I’m not messing up my colour gradients with native masking.
Pros and Cons of This Workflow
Using the proposed Linear Camera Profile workflow is usually cumbersome, and I actually hate that Lightroom doesn’t permit us to reorder masks by dragging and dropping them. But after greater than a month of utilizing linear digicam profiles each day, I really feel that they really opened up extra potentialities for my edits. I now not really feel like I’m preventing to maintain my photographs from getting crunchy when including distinction or taking part in round with aggressive S curves, and the ensuing photographs usually really feel like they’ve far more particulars in them.

In phrases of colour, I additionally really feel like this methodology offers smoother outcomes as a result of all of the grading is finished on a a lot flatter picture, after which the saturation shift from the gamma curve lifts every little thing in a extra balanced manner. I discover this particularly with the colour wheels, the place usually pushing them too far can simply result in muddy tones and ugly colour contamination. But once they sit beneath the S curve in my mask-based gamma setup, the saturation and distinction are distributed extra naturally, so the colour grade finally ends up being extra vibrant within the midtones as a substitute of pumping a lot of colour into the intense shadows or very brilliant highlights. And I actually consider this helps me obtain a extra pure illustration of colour.

So, in conclusion, due to how time-consuming it’s to work with a Linear Camera Profile, I can’t actually advocate this strategy for each certainly one of your photographs. For most photographs, Lightroom’s normal profiles already do a adequate job and can get you to a completed end result a lot sooner. And truthfully, I believe the expertise will solely get higher over time. I’ve already began constructing a library of pre-made gamma masks that I can apply on the fly, which removes numerous the friction.
But for these moments once I want most management over tonal response, spotlight roll-off, colour separation, and total picture rendering, Linear Camera Profiles can be my go-to strategy. It takes longer, but it surely additionally offers me a stage of flexibility that feels a lot nearer to knowledgeable colour grading workflow than a conventional Lightroom edit.
About the creator: Vlad Moldovean is a photographer and visible artist from Brasov, Romania. The opinions expressed on this article are solely these of the creator. You can discover extra of his work on his website, Facebook, and Instagram. This article was additionally revealed here.
This web page was created programmatically, to learn the article in its authentic location you’ll be able to go to the hyperlink bellow:
https://petapixel.com/2026/06/14/how-to-leverage-linear-camera-profiles-in-your-editing-workflow/
and if you wish to take away this text from our website please contact us